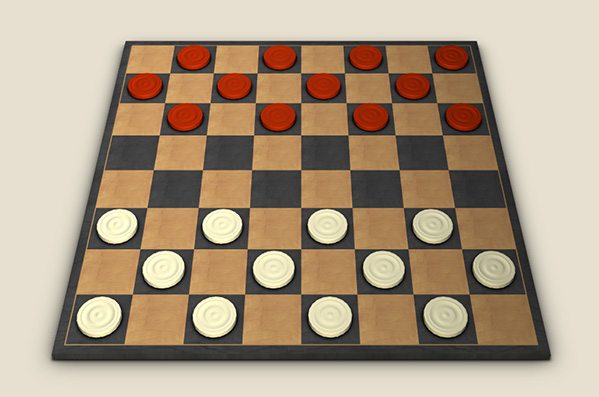
In a previous article we’ve built the basic structure of our 3D checkers game and ended up with drawing a simple cube. In this article we’ll add the board and the pieces. By the end of this part you’ll have something like that looks like this:
First, download and copy the content from the 3D assets archive into 3d_assets/ folder.
Note: Unless specified otherwise, most of the code from this article will go into js/BoardController.js.
Let’s start with some variable declarations:
var cameraController;

var lights = {};
var materials = {};

var pieceGeometry = null;
var boardModel;
var groundModel;

var squareSize = 10;
The name of the variables should be self-explanatory and as we go along they will make more sense.
Creating a light
Before adding any objects into our scene, we need to create at least one light or else the objects will appear black. So, create a initLights function after initEngine:
function initLights() {
    // top light
    lights.topLight = new THREE.PointLight();
    lights.topLight.position.set(0, 150, 0);
    lights.topLight.intensity = 1.0;

    // add the lights in the scene
    scene.add(lights.topLight);
}
For now just a point light is created and placed above the scene. The newly created function must be called from drawBoard after the initEngine call.
Creating the materials
Now we need to create some materials for the objects so that they will not appear in wireframe like the cube from the previous article. So, create a initMaterials function after initLights:
function initMaterials() {
    // board material
    materials.boardMaterial = new THREE.MeshLambertMaterial({
        map: THREE.ImageUtils.loadTexture(assetsUrl + 'board_texture.jpg')
    });

    // ground material
    materials.groundMaterial = new THREE.MeshBasicMaterial({
    	transparent: true,
    	map: THREE.ImageUtils.loadTexture(assetsUrl + 'ground.png')
    });

    // dark square material
    materials.darkSquareMaterial = new THREE.MeshLambertMaterial({
    	map: THREE.ImageUtils.loadTexture(assetsUrl + 'square_dark_texture.jpg')
    });
    //
    // light square material
    materials.lightSquareMaterial = new THREE.MeshLambertMaterial({
    	map: THREE.ImageUtils.loadTexture(assetsUrl + 'square_light_texture.jpg')
    });

    // white piece material
    materials.whitePieceMaterial = new THREE.MeshPhongMaterial({
    	color: 0xe9e4bd,
    	shininess: 20
    });

    // black piece material
    materials.blackPieceMaterial = new THREE.MeshPhongMaterial({
    	color: 0x9f2200,
    	shininess: 20
	});

    // pieces shadow plane material
    materials.pieceShadowPlane = new THREE.MeshBasicMaterial({
        transparent: true,
        map: THREE.ImageUtils.loadTexture(assetsUrl + 'piece_shadow.png')
    });
}
On line 3 a non-shiny material for the board is created with a texture for the color map.
On line 8 a flat material is created for the ground. The ground will fake the board shadow, so a transparent texture is loaded for the color map. When using transparent images the material’s transparent property must be set to true.
The board’s squares will be created as individual objects, so on lines 14 and 19 the materials for the dark and light square is created.
On lines 24 and 30 a material is created for each piece type. Because we want some shininess on the pieces, a MeshPhongMaterial was chosen.
The shadow cast by the pieces on the board will be faked using planes placed under them with a material as shown on line 36.
Now that we have the initMaterials function created, let’s call it from drawBoard just after the initLights call.
Loading 3D objects from external files
With the lights and materials created, we’re ready to load the board and the piece. If you look in the 3d_assets/ folder you’ll find the following files: board.js, board.obj, piece.js and piece.obj.
The .js files are the ones that will be loaded. These are created from the .obj files using the python script from three.js/utils/converters/obj/convert_obj_three.py like this:
python convert_obj_three.py -i board.obj -o board.js
Note: You’ll need Python 2.x installed on you computer to run that command.
If you want to modify the 3D objects or maybe to just have a look at them, you can open the .obj files in a 3D modeling application like Autodesk Maya or 3ds Max.
Note: The pivot point for the board was modified to sit on top of it, at the top-left corner; the pivot point for the piece was placed at the base.
Now let’s modify our initObjects function like this:
function initObjects(callback) {
    var loader = new THREE.JSONLoader();
    var totalObjectsToLoad = 2; // board + the piece
    var loadedObjects = 0; // count the loaded pieces

    // checks if all the objects have been loaded
    function checkLoad() {
        loadedObjects++;

        if (loadedObjects === totalObjectsToLoad && callback) {
            callback();
        }
    }

    // load board
    loader.load(assetsUrl + 'board.js', function (geom) {
        boardModel = new THREE.Mesh(geom, materials.boardMaterial);

        scene.add(boardModel);

        checkLoad();
    });

    // load piece
    loader.load(assetsUrl + 'piece.js', function (geometry) {
        pieceGeometry = geometry;

        checkLoad();
    });

    scene.add(new THREE.AxisHelper(200));
}
On line 2 an instance of JSONLoader is created that will be used to load the external 3D models. Since the objects are loaded via AJAX we can’t call the success callback right away, but after they are loaded. So between the lines 3 and 13 we have some code that will help us to do that.
On line 16 the board model is loaded by passing a URL and a callback function to the loader’s load method. After the board is loaded we create a mesh from the loaded geometry and add it to the scene. On line 21 we verify if all the needed objects have been loaded so that we could call the success callback passed to initObjects function.
On line 25 the piece is loaded. Since we’ll need to create multiple pieces from the loaded geometry we save it for later use. We’ll add the pieces into our scene later.
On line 31 we’ll add an AxisHelper into the scene to be able to see the XYZ axes to help us visualize the objects position.
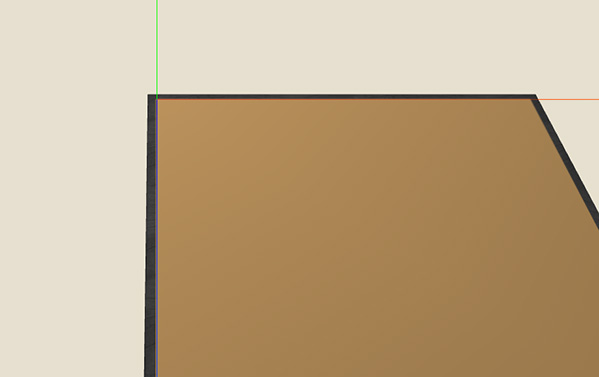
Loading our project in the browser right now you should see something like this:
As you can see the board is automatically positioned so that the top-left corner is at (0,0,0). This happened because the pivot point position was changed in the 3D modeling application before exporting the model. In this way we’ll only have to work with positive values for X and Z axes when placing the squares and pieces.
Now let’s add the squares and the ground that will fake the board shadow:
// load board
loader.load(assetsUrl + 'board.js', function (geom) {
    boardModel = new THREE.Mesh(geom, materials.boardMaterial);
    boardModel.position.y = -0.02;

...

// load piece
...

// add ground
groundModel = new THREE.Mesh(new THREE.PlaneGeometry(100, 100, 1, 1), materials.groundMaterial);
groundModel.position.set(squareSize * 4, -1.52, squareSize * 4);
groundModel.rotation.x = -90 * Math.PI / 180;
//
scene.add(groundModel);

// create the board squares
var squareMaterial;
//
for (var row = 0; row < 8; row++) {
    for (var col = 0; col < 8; col++) {
        if ((row + col) % 2 === 0) { // light square
            squareMaterial = materials.lightSquareMaterial;
        } else { // dark square
            squareMaterial = materials.darkSquareMaterial;
        }

        var square = new THREE.Mesh(new THREE.PlaneGeometry(squareSize, squareSize, 1, 1), squareMaterial);

        square.position.x = col * squareSize + squareSize / 2;
        square.position.z = row * squareSize + squareSize / 2;
        square.position.y = -0.01;

        square.rotation.x = -90 * Math.PI / 180;

        scene.add(square);
    }
}
To be sure that the pieces and the squares do not intersect the board is moved slightly in negative Y axis on line 4. We’ve used a value of -0.02 because the squares we’ll be positioned at -0.01 along the Y axis.
On line 12 the ground is created and on line 13 it’s moved to match the board position using the squareSize property. Remember that we’ve set the value for this property to 10 in the beginning. The board and the piece have been modeled especially for that value. The -1.52 value for the Y axis was taken from the 3D modeling software by measuring the board height and by adding the 0.02 value used to move the board down.
On line 14 the ground needs to be rotated -90 degree along the X axis because a THREE.PlaneGeometry will be positioned along the XY plane.
Note: Three.js works with radians, so if we want to use degrees we need to convert the values.
From line 19 the board’s squares are added.
Right now the camera will look and orbit around the board’s top-left corner, around the (0,0,0) position. Let’s change that by going into the initEngine function and modifying the camera properties:
// create camera
camera = new THREE.PerspectiveCamera(35, viewWidth / viewHeight, 1, 1000);
camera.position.set(squareSize * 4, 120, 150);
cameraController = new THREE.OrbitControls(camera, containerEl);
cameraController.center = new THREE.Vector3(squareSize * 4, 0, squareSize * 4);
On line 3 we’ve modified the X position of the camera and on line 5 we’ve told the camera controller to look at and move around the board’s center position.
The top light also needs to be repositioned:
lights.topLight.position.set(squareSize * 4, 150, squareSize * 4);
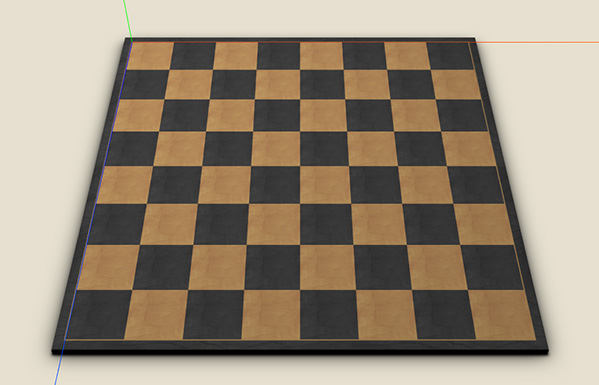
Refresh the browser and you should see this:
Adding the checkers pieces
With the board added and looking nice we are now ready to add the pieces in their starting position. To make that happen we’ll need a variable that will hold the pieces and one public method to add tthem. With that in mind modify the BoardController.js file like this:
...
var squareSize = 10;

var board = [
    [0, 0, 0, 0, 0, 0, 0, 0],
    [0, 0, 0, 0, 0, 0, 0, 0],
    [0, 0, 0, 0, 0, 0, 0, 0],
    [0, 0, 0, 0, 0, 0, 0, 0],
    [0, 0, 0, 0, 0, 0, 0, 0],
    [0, 0, 0, 0, 0, 0, 0, 0],
    [0, 0, 0, 0, 0, 0, 0, 0],
    [0, 0, 0, 0, 0, 0, 0, 0]
];

...

this.drawBoard = function () {
...
};

this.addPiece = function (piece) {
    var pieceMesh = new THREE.Mesh(pieceGeometry);
    var pieceObjGroup = new THREE.Object3D();
    //
    if (piece.color === CHECKERS.WHITE) {
        pieceObjGroup.color = CHECKERS.WHITE;
        pieceMesh.material = materials.whitePieceMaterial;
    } else {
        pieceObjGroup.color = CHECKERS.BLACK;
        pieceMesh.material = materials.blackPieceMaterial;
    }

    // create shadow plane
    var shadowPlane = new THREE.Mesh(new THREE.PlaneGeometry(squareSize, squareSize, 1, 1), materials.pieceShadowPlane);
    shadowPlane.rotation.x = -90 * Math.PI / 180;

    pieceObjGroup.add(pieceMesh);
    pieceObjGroup.add(shadowPlane);

    pieceObjGroup.position = boardToWorld(piece.pos);

    board[ piece.pos[0] ][ piece.pos[1] ] = pieceObjGroup;

    scene.add(pieceObjGroup);
};
On line 4 we’ll use a 2 dimensional 8×8 array to create an internal board representation.
From line 21 the addPiece method is defined. This function will expect as its only parameter an object with properties related to the piece, like color and position.
Because we’ll use a textured plane under the piece to fake the shadow on the board, on line 23 an instance of Object3D is created that will group the piece mesh and the shadow plane together.
Between line 25 and 31 the piece group gets assigned a WHITE or BLACK color and the right material is assigned to the piece mesh.
On line 34 the shadow plane is created and on line 37 and 38 the piece mesh and the shadow plane are grouped together.
On line 40 the piece group is positioned using the pos property from the function’s parameter object. Since its value will be an array holding the position in a 8×8 array, we need to find out the position in our 3D space using the boardToWorld function that will be created immediately.
On line 42 the piece group is stored in the internal board representation and also added in the scene on line 44.
Now let’s add the boardToWorld function right after onAnimationFrame:
function boardToWorld (pos) {
    var x = (1 + pos[1]) * squareSize - squareSize / 2;
    var z = (1 + pos[0]) * squareSize - squareSize / 2;

    return new THREE.Vector3(x, 0, z);
}
The above function will return the center position of the right square.
The last thing we need to do in BoardController.js is to make the drawBoard function receive a callback:
this.drawBoard = function (callback) {
    ...
    initObjects(function () {
        onAnimationFrame();

        callback();
    });
}
Now open the Game.js file and modify it like this:
var CHECKERS = {
	WHITE: 1,
    BLACK: 2
};

...

var boardController = null;

var board = [
    [0, 0, 0, 0, 0, 0, 0, 0],
    [0, 0, 0, 0, 0, 0, 0, 0],
    [0, 0, 0, 0, 0, 0, 0, 0],
    [0, 0, 0, 0, 0, 0, 0, 0],
    [0, 0, 0, 0, 0, 0, 0, 0],
    [0, 0, 0, 0, 0, 0, 0, 0],
    [0, 0, 0, 0, 0, 0, 0, 0],
    [0, 0, 0, 0, 0, 0, 0, 0]
];

...

function init() {
    ...
    boardController.drawBoard(onBoardReady);
}

function onBoardReady() {
    // setup the board pieces
    var row, col, piece;
    //
    for (row = 0; row < board.length; row++) {
        for (col = 0; col < board[row].length; col++) {
            if (row < 3 && (row + col) % 2) { // black piece
                piece = {
                    color: CHECKERS.BLACK,
                    pos: [row, col]
                };
            } else if (row > 4 && (row + col) % 2) { // white piece
                piece = {
                    color: CHECKERS.WHITE,
                    pos: [row, col]
                };
            } else { // empty square
                piece = 0;
            }

            board[row][col] = piece;

            if (piece) {
                boardController.addPiece(piece);
            }
        }
    }
}
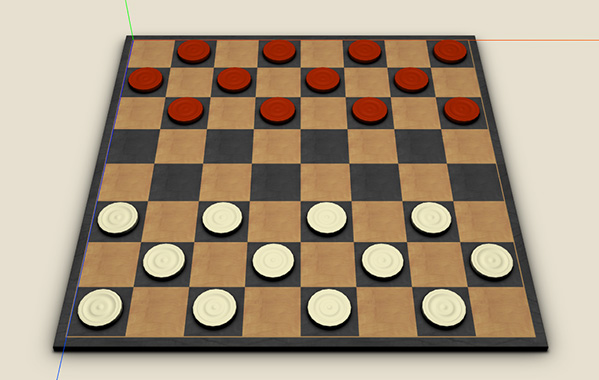
The above code should be self-explanatory and if you do a refresh in the browser you should see something like this:
You’ll notice that the pieces don’t look as nice as in the image from the beginning of the article. That’s because more lights are needed in the scene. You can download the sample code and have a look in initLights function and onAnimationFrame to see how to add the new lights.
End of part 2
That’s all folks! In the next and final article we will allow the pieces to be dragged and some checkers game logic will be added also.
You can download the current phase of the project from here.
If you have questions, suggestions or improvements don’t hesitate to add a comment and let me know about them.


